Friday, April 30, 2021

How to Hire a Website Designer

Whether you want to build a new website for your business or refresh your old site, hiring a web designer can be a critical part of the process.

After all, this is someone who will create the online face of your company, letting you reach out to customers—something that has a massive role in driving sales and boosting revenue.

But the question is, how do you choose the best website designer for your needs? And no, “It depends“ isn’t an answer.

Today, I’ll show you how you can hire a reliable web designer that meets your exact needs, requirements, and goals.

What to Expect When Hiring a Web Designer

Hiring a web designer isn’t easy, but you have to do it, especially since 75% of users will judge your credibility based on how your website looks.

The good thing is you look for a person with appropriate skill sets on several online platforms, compare their portfolios, interview prospects, and then finally hire one who impresses you most.

Step 1 – Define Your Website Requirements and Design Needs

Step 2 – Search for Candidates Online

Step 3 – Shortlist Your Prospectives and Make the Final Call

The Good

Before you start looking for a web designer, you have to decide which direction you want your website to go in.

This may sound complicated, but it really isn’t. Think about the type of website you want, the functionality you want to add, and the tech you want to offer. Your designer can make your vision a reality–provided you communicate your requirements and desires clearly.

With freelance marketplaces like Upwork, Freelancer.com, and Toptal, finding great candidates is incredibly easy. These places have hundreds of designers, each with different pricing and expertise, making them feasible for small and large businesses.

You can see portfolios, ask questions, discuss their working process, and so on before making the final call. Moreover, most of them also offer money security, so you don’t have to pay the freelancers unless you’re satisfied with the end result.

The Bad

You can have a more expensive and better-looking website when compared to your competitor, and no doubt, it does have its perks. A well-designed layout improves visitor experience, makes your business look more legitimate, and keeps your visitors on your page for longer.

But there’s really no point in having a good website design if your business idea isn’t good enough. Test out your business idea to see whether it can make money before injecting hundreds of dollars into designing a website.

In my experience, it’s better to wait when it comes to hiring a designer if you’re still trying to get the business off the ground or if you don’t have a healthy market for your product or service.

Additionally, designing a website is only half the work—you also need an actual functioning website (this is where a web developer comes into the picture), SEO-optimized content, an excellent product or service, a good support team, among others aspects indirectly related to your website.

Step 1 – Define Your Website Requirements and Design Needs

Here’s a simple question for you: How do you want your website to look?

You have to figure out the answer to this question if you want a good end product.

Translating a vague idea conceived in someone else’s brain into something tangible, and your web designer is no exception. The more specific you are, the better website you’ll have.

Determine Your Tech Needs

Websites can be of different types. For instance, a brochure site is different from a site offering users a specific functionality. While the former is created to inform visitors about your brand and contact details, the latter seeks to help visitors. This can include offering a free grammar check, supplying domain authority information, and so on.

Let me explain this with an example.

Suppose you want to launch a website for your non-profit. You should know whether you have the expertise to manage and maintain the website, want to implement portal logins and donation links, and if users can integrate with specific profiles.

Get it?

Here’s how you can decide your tech needs:

  • What functionality do you want to offer to your visitors?
  • Do you want to be able to edit and manage your website content once it is built?
  • How do you see your website growing?
  • Will your visitors have to work with your website at all?

Finalize the Feel of Your Website

Vague concepts and ideas can spell disaster—precisely why you need to chalk out your website’s look and feel.

Start by creating a list of websites you like and articulate what you like and dislike about them.

Remember, you have to be specific here. Think about whether you would want to give visitors choices, how you’d like to receive feedback, and what aspects you consider most important in your website.

Budgets are equally important, so think about what you’re willing to cut and what are your top priorities.

Try to incorporate as many pointers as possible and draw a rough draft of how you want your website to look. This will give your designer a direction of where you’d like to go—even if your drawing looks like a random scribble on the paper.

Trust me, it’ll help tremendously down the line. You’ll be able to communicate your ideas to your website designer better, and the designer can then tell you how achievable your vision is and what it will cost.

Step 2 – Search for Candidates Online

The internet is the best place to find capable web designers and web designing agencies. You can perform a broad search or get as specific as you want by including the name of your city or area in your search query.

Go through the different search results, and compile a list of prospects that look good to you.

Do a Google Search

The whole point of Google is to provide you with the best possible search results for your queries.

It’s why performing a Google search for “web designers for hire” should top your to-do list. You can go into more detail by searching for terms like “WordPress web designers” or “WordPress web designers in California,” too.

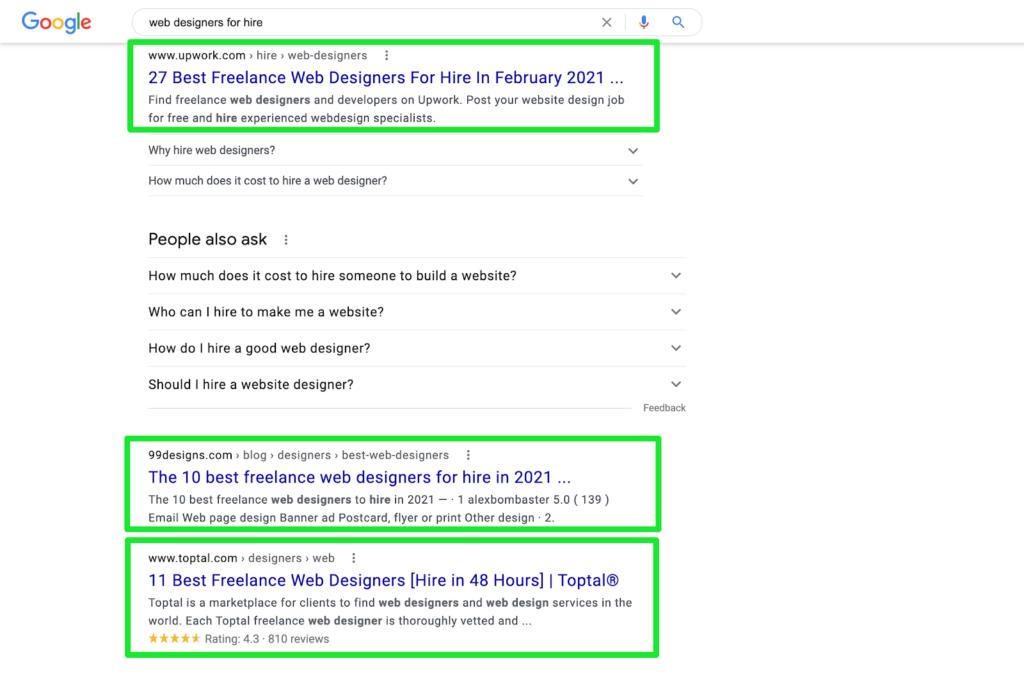
You’ll see a list of the most popular web designers for hire on various marketplaces like Upwork, Toptal, and 99Designs.

Let’s discuss how you can hire a web designer on these platforms.

Hiring a Web Designer On Upwork

Upwork is arguably the best site for hiring a freelance web designer. It’s a massive user-friendly job portal marketplace.

Freelancers can apply for your web designing job post, and you can go through the list of applicants to select the right match.

Upwork also offers a time-tracking feature to make billing accurate and fair. What’s more, it takes screenshots of a freelancer’s monitor every few minutes to ensure they’re actively working on your project.

Hiring a Web Designer On Toptal

Toptal is the crème de la crème of freelancers. They say they have the top 3% of the best freelancers as only experts apply freelancers on the platform. They also have a stringent five-step screening process.

In short, you’re assured of the best talent. You must have a higher budget if you plan on using Toptal freelancers. After all, they are experts.

Hiring a Web Designer On Fiverr

Fiverr is another reliable site that offers capable web designers at affordable rates.

Now, this marketplace has a very different approach: It’s the freelancers that post about the kind of jobs they want to do. You look at profiles and hire them if you like what you see.

Think of Fiverr as a search engine. You’ll find freelancers from all over the world, portfolios, feature ratings, and reviews there.

Step 3 – Shortlist Your Prospectives and Make the Final Call

Shortlisting candidates means eliminating those who lack the technical skill and expertise you require. Or perhaps you just don’t resonate with their portfolios. You can nix a candidate for any reason.

Again, this is an elaborate process where you analyze portfolios, contact past clients, and finally, discuss your vision with the selected web designer and get a price quote and timeline.

Look for the Right Skill Sets

A Photoshop prodigy isn’t enough to get the job done. You want someone who understands how to create a website that can meet your business objectives.

Below, we’ve compiled a list of a few skills a web designer should be proficient in. Of course, the prospects don’t need to have all the skills—just as many as possible.

Mobile Optimization 

Websites today have to be optimized for all devices, including smartphones and tablets. Therefore, all prospects should be comfortable building a mobile-first design or mobile-responsive website that has functional visual and interactive elements on all devices.

Content Management System or CMS Expertise

You can use CMS software to make updates to an already live website. These systems make it easy to add, modify and remove content from your website to improve it further.

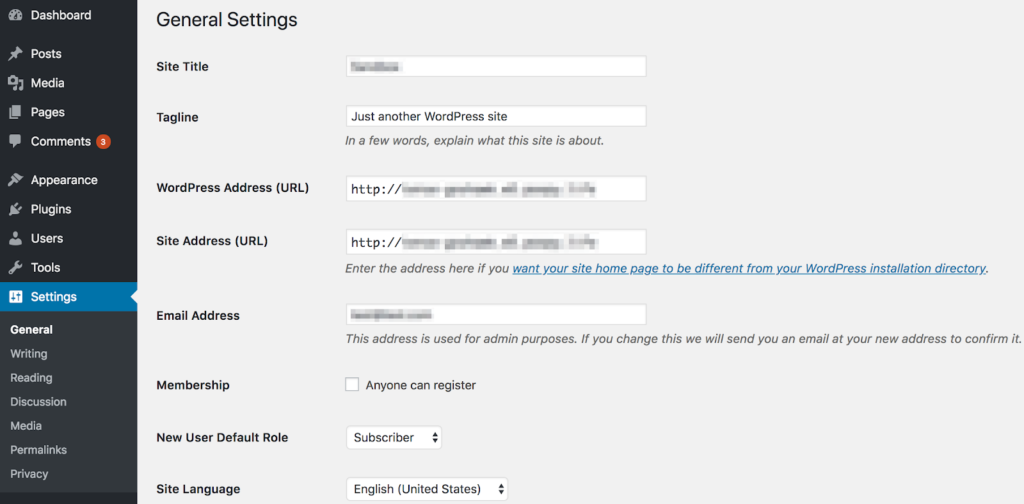
Hire a designer who can work with at least one CMS platform—I recommend WordPress, Drupal, and Joomla—so that you don’t have to call the web designer every time you want to make a change to your website.

HTML and CSS Knowledge

Yes, you’re right: Designers don’t have to be computer programmers. However, HTML and CSS proficiency is needed as the two languages are the building blocks of websites. It’s also what distinguishes web designers from graphic designers.

Adobe Creative Suite 

Adobe Creative Suite includes Photoshop, Illustrator, and InDesign. These are tools used to create original designs to fit their client’s needs. So, your prospects should be experts with these tools.

If a designer uses software other than Adobe Suite, ask them why they prefer it. Judge them based on how confidently they answer your question.

Search Engine Optimization or SEO Skills

Your web designer should abide by SEO best practices. It’s really the only way your website can rank higher and get you more organic traffic.

This may come as a shock to most, but designers have a crucial role in making your website visible to search engines. Gauge whether a prospect speaks confidently about SEO and if any of their past sites rank on the SERPs.

Typically, it’s best to have someone who is an expert in Photoshop and branding and has abundant knowledge about design implementation and working with a front-end developer. Familiarity with back-end technology would be a plus too.

Continuing with our non-profit example, let’s assume you want to add donation abilities to your website that’s suitable for beginners.

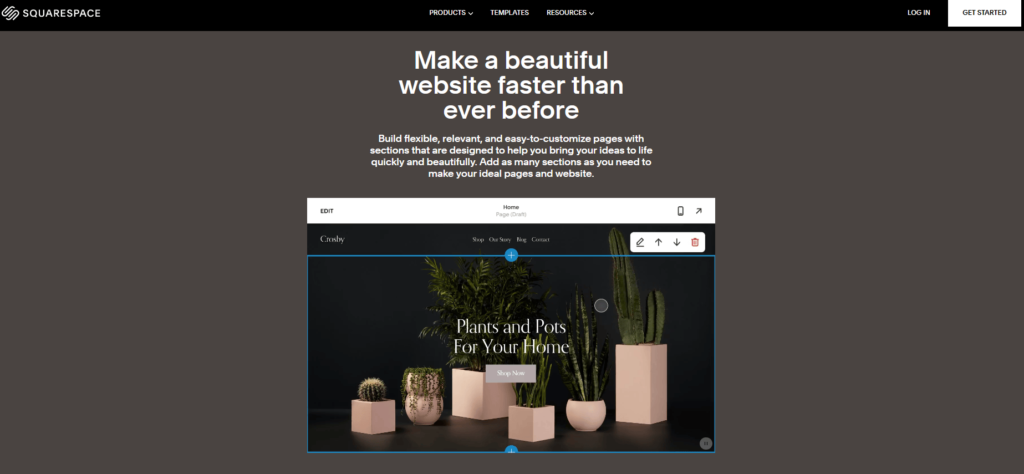
In this case, the web designer should use a sophisticated website builder like WordPress.com or Wix. Not only can both platforms easily integrate donations and offer affordable plans, but they’re also beginner-friendly, having fewer upfront capabilities.

Analyze the Portfolios of Applicants

When looking for design portfolios, you’ll find that most of the designs don’t suit your taste. This is because these designs are a reflection of the vision of their previous clients. So don’t rule them out just yet.

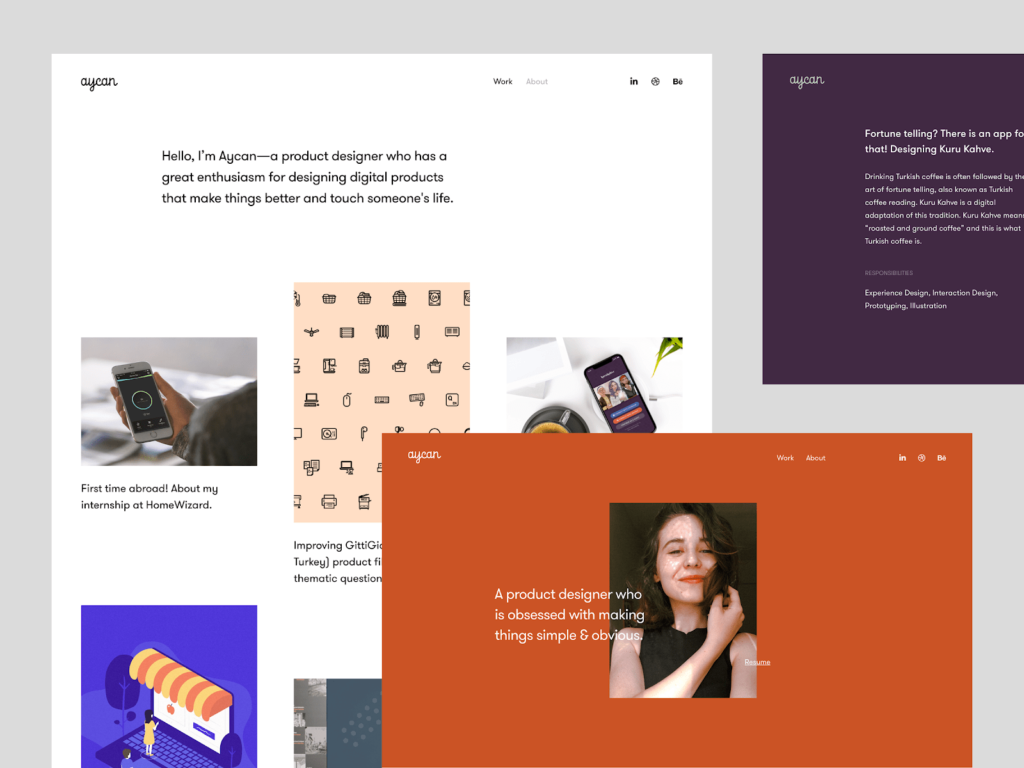
On the contrary, you should look for diverse work samples as it’ll give you a better idea of how the designer incorporates the client’s requests into the final result. It is how you can identify the most talented and versatile web designer.

Here’s how you can properly analyze a portfolio to shortlist candidates:

Check the Website Design

  • Is the website design visually appealing?
  • Do you think it represents the client’s brand and voice?
  • What is the designer able to communicate the goals of the business effectively?

Check Usability by Visiting the Actual Sites

  • Do the websites load quickly?
  • Do the websites look good on your laptop and a mobile device?
  • Are the websites easy to navigate?

Check the Business Potential

  • Is the point of the websites just to look pretty or to bring in actual business?
  • Do the websites have well-placed calls-to-action (CTAs)?
  • Can the web designer explain how their website helps generate new business?
  • Do the websites in the Google search results?

Check the Website Functionality

  • Does the prospect’s portfolio include sites similar to your website needs?
  • Do the websites have functionalities that you want to add to your website?
  • Can the prospective web designer explain his methodology with clarity?

Communicate With Your Designer’s Past Clients

While viewing a portfolio will give you a better idea about the website design, speaking with a prospect’s past clients will tell you how it’s like working with them.

Wondering what to ask the past clients? Here are a few pointers:

  1. What’s it like to work with the designer?
  2. How would you describe his business style, responsiveness, and creative insights?
  3. Does the designer deliver within deadlines?
  4. Were you able to launch a website on the anticipated date?
  5. How is your website performing?
  6. Did you see an uptick in leads or sales after the launch of the website?

Remember, an unhappy client may not always be the designer’s fault. Try to assess whether the problem lies with the web designer or the client.

Make the final call after going through all the applicants. Access every candidate’s strengths and weaknesses, portfolios, and most importantly, their work ethic. Finally, choose a web designer that you find the most suitable for your specific website.


from Quick Sprout https://ift.tt/3nzT6C1
via IFTTT

Thursday, April 29, 2021

How to Integrate Project Management Into Slack

Slack has quickly become one of the most popular business communication platforms on the planet. Trusted by 750,000+ companies across every industry, this live chat, voice, and video conferencing tool is a fast and simple way for teams to communicate.

In fact, the company unintentionally turned into a verb. It’s not uncommon for people around the office to say something like “Slack me later,” or just “Slack me,” to their co-workers.

But Slack is not a project management solution out-of-the-box. However, it can be used to extend the functionality of a project management tool to improve the way teams collaborate.

Integrating your project management software with Slack limits the amount of time you need to spend going back and forth between each platform. Slack can automatically notify you about task assignments, deadline reminders, and more. You can even mark tasks as complete within Slack.

Ready to take your project management process to the next level? This guide will teach you how.

What to Expect When Integrating Project Management Into Slack

Here’s a brief overview of the step-by-step process for integrating Slack with your project management software:

  1. Sign Up For Slack
  2. Verify Your Project Management Compatibility With Slack
  3. Install Your Project Management App in Slack
  4. Manage Your Projects and Teams With Slack Channels
  5. Explore Slack’s Capabilities For Project Management

The Good

There’s a good chance that you won’t have to switch project management solutions to get started. Slack integrates with all of the best project management software on the market today. So for those of you who are already comfortable with a certain tool, you probably won’t have to re-train your team to use another solution.

The integration process itself is really simple. There isn’t any coding required, and non-technical users can complete the integration with just a few clicks—no need to hire a developer or get your IT department involved with this process.

Once the integration is complete, your team won’t have to spend as much time in the project management platform. For many companies, the Slack dashboard is open during all working hours. Teams are used to having Slack messages appear in the background of whatever they’re working on, so they can quickly contribute to time-sensitive communications.

But having to keep your project management dashboard open at all times can clutter your desktop and slow down your productivity. The Slack integration eliminates this need. All of the project management notifications will go directly to Slack instead. So your team can view and respond to these notifications in the platform that they’re already using. This capability is perfect for teams who are already familiar with Slack but new to the idea of working with project management software.

Aside from the PM software integration, Slack has other capabilities that are perfect for project management as well. You can create different channels for teams, projects, updates, and more. This is an easy way to keep everyone organized and ensure all of your messages are going to the right people.

Slack works for team file sharing and collaboration too. In addition to project management software, Slack integrates with file management services like Google Drive, Dropbox, Box, and more.

You can use Slack to automate workflows for complete customization as well. For project teams and project managers alike, integrating project management into Slack will benefit everyone.

The Bad

Slack is not a replacement for standalone project management tools. It doesn’t come with Gantt charts, Kanban boards, resource management tools, project management reports, time-tracking tools, and everything else you need to manage a project effectively.

Integrating Slack with project management doesn’t eliminate the need to use your project management software. It just extends the functionality of each solution to better accommodate your needs.

The Slack notifications and messages for project management will only be as good as the software you’re using. Everything still needs to be configured within that tool before you can get the most out of Slack. So if things aren’t organized in your project management dashboard, Slack won’t magically correct them.

The main benefit of integrating Slack with project management is that you won’t have to constantly bounce back and forth between two dashboards—this is unproductive. But you can’t just close your PM dashboard and never open it again.

Slack does have a free version, but that plan limits your integrations. If you haven’t done so already, make sure you upgrade to a paid version of Slack to avoid any problems here.

It’s also worth noting that by integrating project management into Slack, your team will be getting more notifications than usual. This can cause productivity problems for people who can’t effectively manage their notifications. Some team members might find the extra messages disruptive. But simply changing your notification preferences can eliminate this issue.

Like any new initiative, there will always be a learning curve. Some team members might have some pushback because they’re hesitant to change. As a project manager, you must be able to deal with this feedback properly to ensure your team embraces the change.

Step 1 – Sign Up For Slack

Obviously, you need to have a Slack account to integrate your project management solution with this tool. So if you haven’t already signed up for Slack, this will be your first step.

For those of you who already have a Slack account, don’t skip this step just yet. You should upgrade to a paid plan to avoid any issues with the integration. Slack does a free plan, but the integrations are limited. In general, the free plan isn’t a great option for business use anyways, so this upgrade is likely long overdue if you’re using Slack to collaborate with project teams.

Here’s a brief overview of the plans and packages to choose from:

I’ll describe each of these in greater detail below.

Standard

Slack’s Standard plan will be the best option for the vast majority of teams. The package supports an unlimited number of apps and integrations, so you can integrate Slack with your project management tool without any issues or restrictions.

You’ll have access to your entire message history, and the plan comes with 10 GB of storage per user. The Standard plan allows you to work securely with other teams via Slack Connect. It supports OAuth with Google, Two-factor authentication, and custom retention policies for all files and messages.

The plan comes with other great features like custom user groups for teams and departments and the ability to organize channels, messages, and apps into collapsible sections. These benefits are extremely useful for project management integration.

Slack Standard offers priority customer support as well, so it’s definitely worth the upgrade from a free plan.

Plus

Slack Plus is built for larger organizations or anyone business that needs advanced administrative capabilities. If you’re a project portfolio manager, you could benefit from this package.

The plan comes with double the amount of storage per user as the Standard plan and also offers SAML-based SSO (single sign-on). Slack Plus offers user provisioning, real-time active directory sync, and the ability to manage posting permissions for any channel.

You’ll also benefit from a 99.99% uptime SLA.

Enterprise Grid

The Enterprise Grid package is designed for large businesses or organizations that need to accommodate strict industry regulations. For example, if you’re managing a project in the medical industry, you’d need Enterprise Grid for HIPAA-compliant collaboration.

You’ll benefit from EMM (enterprise mobility management) integrations, an audit log API, and the ability to manage compliance, security, and billing from a single view.

All Enterprise Grid customers have a designed account success team for the ultimate experience in customer service. If you’re interested in this package, you’ll need to contact the Slack sales team for a custom quote.

Step 2 – Verify Your Project Management Compatibility With Slack

Once you’ve signed up, you need to make sure that your project management software can integrate with Slack. If you don’t see your software on the list, there are a few workarounds. You could potentially use a third-party tool like Zapier to connect Slack with your project management software.

But most of you shouldn’t have to worry about this. If your project management software doesn’t connect with Slack, you might want to explore alternative solutions. Check out our list of the best project management software on the market today to see our top recommendations.

Here’s how to search for your PM software in Slack:

Navigate to the Integrations Page

From the Slack home page, find Integrations under the Product menu at the top of the screen.

This page will give you more information about connecting the tools you’re already using with Slack. It’s helpful to review this content if you’re unclear about how the integration works or if you have any other questions.

When you’re ready to proceed, scroll until you see an option for the Slack App Directory.

Slack integrates with 2,400+ apps. This number continues to grow on what feels like a daily basis. In addition to project management software, you’ll be able to connect other third-party business apps to Slack from this page as well.

Search For Your Project Management Software

There are a few different ways to find your preferred project management software in the app directory. For those of you who are already using a particular tool, the easiest way would be the search bar at the top of the page.

If you’re not currently using a project management tool and you want to see what Slack has to offer, you can browse through the project management integrations by category as well.

Navigate to the Categories menu on the left side of the screen. Then click on Project Management.

Now you can browse through the countless options like Trello, Asana, Jira, Teamwork, Zoho Project, and more.

Step 3 – Install Your Project Management App in Slack

Regardless of how you navigated through the Slack App Directory, simply click on your project management software when you find it.

Next, click Add to Slack on the left side of the screen for the software you’ve selected.

For this example, I’m using Zoho Projects. It’s one of our top recommendations in the project management software space and versatile enough to accommodate any type of project.

This step will look the same for whatever tool you’re using. It’s just a matter of finding that tool and clicking Add to Slack.

Sign-in to Your Project Management Software Account

Slack will automatically prompt you to sign in to your PM account to complete the installation. Here’s what that page looks like for Zoho Projects:

The screen will look slightly different depending on the software you’re using, but the same concept holds true across the board.

Once you’ve signed in, you’ll need to just Allow Slack to integrate with your PM tool. This will complete the initial installation process.

Step 4 – Manage Your Projects and Teams With Slack Channels

To use Slack effectively for project management, you should set up different channels for each team and project. Depending on the nature of your project, you can set channels to public or private.

Slack channels will ultimately act as the primary communication method for your project team. So it’s important to segment things accordingly. This will also make it easier when you’re setting up the notifications in Slack from your project management software.

Here’s an example of what project management notifications could look like within a Slack channel:

Keeping your Slack account organized will be crucial to project management success. Otherwise, too much clutter and noise could backfire with what you’re trying to accomplish.

Step 5 – Explore Slack’s Capabilities For Project Management

By now, you’re already up and running with Slack for project management. But to truly get the most out of this extended capability, you need to have a firm grasp of your options.

In terms of project management functionality, here are a few possibilities for you to consider:

  • Automate the process of creating a new task directly in Slack
  • Schedule action items in your project management software from Slack
  • Improve your project management oversight by setting up status updates and deadline reminders
  • Allow team members to collaborate on tasks, files, or other shared documents

For advanced functionality, you can use Slack’s workflow builder to automate mundane processes. This is a no-code workflow builder, and can it’s an easy way to automate tasks between your project management software and Slack.


from Quick Sprout https://ift.tt/2PEKw8E
via IFTTT

Wednesday, April 28, 2021

The Complete Guide to Google Voice Conference Calling

We find ourselves in unique times. Outsourcing manpower and remote workforces have become the very lifeline for businesses to continue uninterrupted operations.

Amidst all this chaos, conference calls have quickly become the need of the hour.

As well as for client meetings, you can use conference calling to stay in contact with your team members and ensure the smooth functioning of the daily activities of your business. Whether your employees are from abroad or around the country, there are plenty of amazing free and paid conference call services for you to try out.

In this guide, though, we’ll focus on an excellent cloud-based phone solution called Google Voice.

Read on as we show you how to set up Google Voice conference calls for professional and personal use, alike.

What is Google Voice Conference Calling?

A conference call is an audio or video call involving multiple participants. You can hold and attend conference calls on Google Voice.

People can join the meeting by dialing a number, which will connect them to a conference bridge. This bridge consists of virtual rooms where multiple people can host or join meetings.

Google Voice uses Google Hangouts to complete conference calls, though it doesn’t require you to have a separate, dedicated conference line in either app to host or join the calls. So when you make a conference call via Google Voice, you’ll have a dedicated space within your account with anytime-anywhere access to host a conference call.

3 Tools to Improve Google Voice Conference Calling

Now that we’ve discussed the meaning of a conference call, let’s take a look at what you need to easily make the call.

Google Voice Account

If you’re one of the very few people who doesn’t have a Google account, make sure you get one right away.

Before setting up a conference call, you have to be signed in to your Google account. Once that’s done, you can proceed to make a Google Voice number for you.

Don’t have a Google Voice account? I got you. Simply follow the steps below:

  1. Visit the official Google Voice site. You can also type in https://voice.google.com/ in your web browser.
  2. From there, you can select two options: For Personal Use or For Business.

  3. If you click For Personal Use, you’ll see three options, namely iOS, Android, and web. On clicking on these options, you’ll have to set up a Google Voice number for your account, for which you’ll have to choose any nearby location from the dropdown menu.
  4. Choose any of the numbers from the list. You now have to verify your existing phone number, so click on Verify on the next screen.
  5. Type in your number on the prompted box, and then verify it by providing a six-digit code you receive on your phone. The inbound call will then be directed to your provided number.
  6. Once the verification is over, click on Claim to allow the call forwarding to your phone.
  7. Finally, select Finish to wrap up the whole process.

On the other hand, on clicking For Business, you’ll be redirected to a page with a Get Started button.

Once you click on the button, you’ll see three different pricing plans: Starter, Standard, and Premier. Select one that seems the most appropriate for your business requirements.

You can then sign up using your Google email address.

Any Device to Make the Google Voice Calls

You can use iOS and Android devices for Google Voice conferencing calling. It can be either a mobile phone, computer, or tablet.

A Stable Internet Connection

Although it’s not a tool per se, having a reliable internet connection to make and attend calls via Google Voice is incredibly important.

You see, Google Voice itself is cloud-based, which essentially means all its functions are held over the cloud, a.k.a over the internet. It’s why even you need the internet to use Google Voice.

I also recommend getting a strong internet connection to make sure your conference runs smoothly. This goes for everyone joining the call because if any participant has a weak connection, it’ll result in audio and visual lags, which, in turn, will affect the call quality.

The Basics of Google Voice Conference Calling

Let’s now dive into the core components of making a conference call through Google Voice.

No Holds Barred Conference Calling and SMS

With subscription plans starting at just $10 per user per month, Google Voice is one of the most cost-effective conference calling solutions you can get your hands on.

If you compare this price to the standard cell phone or landline packages, you’ll find Google Voice to be way cheaper. Plus, you don’t have to worry about any minute restrictions or overcharges either! It’s included in the base rate.

You can make unlimited free calls to the United States from any country, as well as from the US to Canada. Unlimited free SMS messaging is another benefit available to United States citizens.

As mentioned previously, you have to use Google Voice with Google Meets or Google Hangouts as the service doesn’t offer video chat and conference calling as standard features.

Incoming Calls Screening and Filtering

You can filter incoming calls through Google Voice—just like you set up filters and rules when emailing.

The filtering feature can be particularly useful to manage the incoming calls more efficiently, which, in turn, will allow you to boost productivity.

Whether it’s an old colleague you’d rather not talk to, receiving solicitation calls from spammers, or simply warding off unwanted numbers, Google Voice lets you send your calls to voicemail as well as block them altogether. You can also have a special voicemail message assigned to a specific number if you want.

The call screening feature is where a caller introduces themselves before the call is put through you. This way, you’ll have a better idea about who you’re going to talk to before actually picking up the phone.

Effortless Compatibility With Any Device

You get a free phone number from Google Voice that gives you unrestricted access from any device.

You can use your Google Voice number to make and receive calls through iOS, Android, or web applications, ensuring everyone on your team can stay connected from anywhere.

Bear in mind that you don’t get a desktop application for Google Voice, unlike other VoIP phone providers. Aside from the mobile apps, everything else is web-based.

Strong Scalability

Google Voice offers some fantastic scalable plans.

The Starter plan, for instance, is best for teams of up to 10 members where you’ll be limited to 10 domestic locations. However, if you upgrade to the $20 per user per month Standard plan, you’ll get unlimited users and unlimited domestic locations.

In addition to this, you get several other useful features like ring groups, eDiscovery for calls, SMS, and voicemail records, and multi-level auto attendants, to name a few.

The Premier package, starting at $30 for use of a month, is more suitable for people who operate internationally. This plan supports unlimited international locations in addition to the unlimited users and unlimited domestic locations offered in the Standard plan.

You can select a plan that suits your business requirements best, irrespective of how big or small your team is.

5 Tricks for Google Voice Conference Calling

You can use a few tricks and tips to optimize your conference calling experience on Google Voice. While there are many others, here are my top five:

Make Sure Everyone Knows About the Conference Call

Conference calls often take longer, which is why everyone needs to clear their schedules before hopping on a call. It’s also why you must ensure everyone knows about the conference call beforehand.

Moreover, participants will know when to call your Google number and at what time as well. When you’re on a call, you can press 5 to add every subsequent call.

You can create a Google Calendar invite, where you add Google Voice Conference Calling as an event before sending out invites to your guests. Or you can send a message or email telling them about your intent to hold a conference call.

The choice is yours.

Customize Day-to-Day Workflows

Google Voice can be great for customizing daily workflows around scheduled conference calls. It has an admin control center that lets you customize number assignments, porting, auto attendance, call forwarding, and reeling from a single location.

You can assign one of your Google Voice numbers to different users with just a few clicks.

Remember, the platform isn’t compatible with third-party software outside of the Google family. So don’t expect integrations with a CRM, helpdesk, or other apps.

Link More Phone Numbers

Google Voice users can use any other phone number to make and receive calls and texts. While you can link up to six different phone numbers, you can’t link numbers that have already been linked to a different Google Voice account.

Here’s how you can link a new phone number in Google Voice:

  1. Open your account, and go to Settings.
  2. Select New Linked Number from the Linked Number menu, and enter the new phone number you want to link here.
  3. Google will send a six-digit code to that number. You’ll receive a text for a mobile number and calls for a landline number. Enter that code in Google Voice
  4. Hit the Verify button.

And that’s it! You’ve now linked a new number to Google Voice.

Detect and Deflect Spam

Nobody likes spam calls—not me, not you.

However, they’ve become an everyday occurrence with an increasing number of scammers and spammers using spam to get your personal information. Not only does spam expose your team to potential scams, but it also kills productivity.

Luckily, you don’t have to worry about spam when making conference calls through Google Voice.

The service utilizes artificial intelligence technology to automatically filter spam calls. You can also view your spam calls, texts, and voicemails from another section of your Google Voice app.

Think of it as your Gmail junk folder.

Record Calls for Future Use

Google Voice has a useful call recording feature that works with a single click.

All you have to do is press the number 4 on your dial pad once all the participants are on call. An automated announcement will play for all call participants, explaining that the call is being recorded.

If you want to stop the recording, press the number 4 again. You can also directly end the call to stop the recording.

All the call recordings can then be accessed and played back in your voicemail tab. This can be useful for future reference where you can go back to it in case you forget an important point that was discussed during the conference call.

Note: The call recording feature is only available for personal use and not for business use or workspace accounts.


from Quick Sprout https://ift.tt/3ntFUi0
via IFTTT

Tuesday, April 27, 2021

The Complete Guide to Earned Value Management

Project managers are faced with tough decisions on a daily basis. Some of these choices can make or break the success of a project.

But what drives your decisions? How do you measure the core elements of the project?

Without a proper system in place, project managers are forced to make gut decisions that don’t always align with the data. While this may work sometimes, it’s not a sustainable framework for the long-term, and it can be extremely costly.

If you’re looking for a better way to keep your project on track, earned value management might be the solution for you. This guide will explain everything you need to know about earned value management so you can implement this framework into any existing or future projects.

What is Earned Value Management?

Earned value management (EVM) is a structured approach to measure cost, scope, and schedule at a task or project level. With EVM, project managers gain data-driven insights to objectively understand what’s happening with the project.

It’s a deeper way of simply looking at a project schedule and budget. EVM allows managers to understand the actual work and progress that’s being accomplished. Earned value management ultimately helps project managers estimate the total cost and completion dates of a project with greater accuracy.

3 Tools to Improve Earned Value Management

To have the best possible experience with earned value management, you should be using software to your advantage. These are my top three favorite tools for EVM:

#1 — Zoho Projects

Zoho Projects is a cloud-based project management solution trusted by teams across a wide range of industries. It’s perfect for project planning, remote work, and team collaboration for projects of all shapes and sizes. One of the reasons why I like Zoho Projects so much is because it’s user-friendly and affordable. There’s virtually no learning curve, and premium plans start at just $5 per user per month.

In terms of earned value management, Zoho Projects has everything you need to succeed. You can use it to create a work breakdown structure to get organized and plan your project in the initial stages. Zoho Projects lets you calculate earned value management from the budget settings of your project dashboard as well.

You can also use this tool to create a chart for earned value analysis including, earned value, planned value, actual cost, and planned cost. Then you can share these reports with the appropriate parties and use them to make data-driven decisions.

Try Zoho Projects for free with a 10-day trial.

#2 — Smartsheet

Smartsheet is one of the most versatile business tools on the market today. This robust platform takes the concept of a basic spreadsheet and brings it to the next level with data-driven insights and graphs. While the software is trusted across a wide range of different departments and industries, there are specific solutions within Smartsheet that can be applied to project management.

The tool has features project planning, scheduling, task tracking, resource management, budget tracking, strategic planning, and more. In terms of earned value management, these are the data points that you’ll need to be calculating.

You can set up Smartsheet to calculate scheduling and budget variance, as well as the other key metrics associated with earned value. Smartsheet comes with templates for EVM, so you won’t have to prepare your spreadsheet from scratch.

Business plans start at $25 per month, and you can try it for free with a 30-day trial.

#3 — ProjectManager.com

Over 375,000 project managers across the globe rely on ProjectManager.com. The software is trusted by NASA, Volvo, Avis, the United States Postal Service, and other well-known organizations in various industries. This software comes with everything you need to plan, track, and report your projects.

I like ProjectManager.com because it comes with built-in tools for earned value management. There’s even a time panel within your project dashboard that will calculate whether you’re ahead, behind, or on schedule using a visual graph. Use the software to track progress by task, measure cost, and get an in-depth view of the overall health of your project as it relates to EVM.

You can use ProjectManager.com to generate reports and share them with executives or key stakeholders as well. Plans start at just $15 per month. Sign up today to get started with your 30-day free trial.

The Basics of Earned Value Management

Let’s take a closer look at the core components of earned value management. The following sections will make it easier for you to fully understand and digest this concept so you can apply it to your projects.

Earned Value Management Calculations

As an EVM beginner, some of the terminologies can be a bit intimidating at first glance. While there is some math involved, it’s actually fairly easy to understand. There are plenty of online tools and project management software options out there that can help you with these calculations, so you don’t have to worry about doing too much by hand.

Here are the calculations you need to know:

    • Planned Value (PV) — PV is the budgeted cost for work scheduled. It varies on the scope of the project and your overall progress in the schedule.

PV= (Total Project Cost) x (% of Planned Work)

    • Actual Cost (AC) — AC is the actual cost of work performed to date. This is easy to calculate if you’re using software to track costs. Just don’t forget about hidden expenses like resources, materials, software, overhead, and more.

AC = Cumulative Sum of Costs to Date (or over a specific period)

    • Earned Value (EV) — EV is the overall project budget multiplied by the current percentage of the project’s completion. It’s helpful to compare your budget and schedule estimates against the actual project status.

EV = (Total Project Cost) x (% of Actual Work Completed)

Once you’ve determined PV, AC, and EV, you can use variance metrics to determine how far off you are from the project baseline. Here are the EV variance calculations you need to know:

    • Schedule Variance (SV) — SV is a quantitative indication of your progress related to the forecasted schedule. If the SV is negative, you’re behind schedule, and if it’s positive, then you’re ahead of schedule. An SV of zero indicates that the project is exactly on schedule.

SV = Earned Value- Planned Value

    • Cost Variance (CV) — CV measures your divergence from your actual costs compared to the original budget. If the CV is negative, you’re over budget, and if it’s positive, you’re under budget. A CV of zero indicates that the budget is exactly on track.

CV = Earned Value – Actual Cost

Aside from variance, you can also measure your project performance through indexes. These calculations will also help you measure schedule and cost:

    • Schedule Performance Index (SPI) — If the SPI is greater than one, the project is ahead of schedule, and if the SPI is less than one, then the project is behind schedule.

SPI = Earned Value Planned Value

    • Cost Performance Index (CPI) — If the CPI is greater than one, the project is under budget, and if the CPI is less than one, then the project is over budget.

CPI = Earned Value Actual Cost

In short, once you take the basic calculations (PV, AC, and EV), you can use them to measure the project performance by variance (SV and CV) or see how the project stands on an index (SPI and CPI).

Project Scope and Organization

To get started with EVM for an actual project, you need to get organized and determine the scope of your project. There are three formal documents that can be used to accomplish this:

  • Work Breakdown Structure (WBS)
  • Organizational Breakdown Structure (OBS)
  • Responsibility Assignment Matrix (RAM)

The WBS is designed to separate high-level deliverables into smaller packages of tasks. It’s displayed on a graph to provide a visual representation of the work scope based on hierarchy. An OBS shows all of the people, departments, and teams involved with the project. This is also displayed on a chart based on hierarchy and includes everyone’s responsibilities.

The responsibility assignment matrix combines WBS and OBS. It explains exactly who will perform which tasks by stage of the project.

Planning, Scheduling, and Budgeting

These parameters are used to monitor and control the project from start to finish.

You’ll use a WBS during the initial planning stage. But you’ll also need to continue monitoring all tasks and milestones. The best way to do this is with a schedule that contains due dates for each task.

Your project budget must be kept in mind at all times. This includes the scheduling process. You must determine the cost of each task or activity within the schedule. The sum of all your work costs will be used as the performance baseline. You’ll measure against this number throughout the project to see how far you’ve deviated from the plan.

Accounting Factors

To ensure accuracy with earned value management, you must take your bookkeeping and accounting principles into consideration. It’s crucial that actual costs of work completed are captured consistently throughout the entire project.

There could be instances where you incur a cost today but don’t actually pay it until months down the road. But this cost needs to be accounted for at the time it was incurred to calculate the earned value accurately.

To avoid this problem, you should be using accrual-based accounting for your projects.

Analytics and Reporting

Once you’ve performed the calculations listed earlier, you need to report these metrics to stakeholders, sponsors, and executives involved with the project. This will give everyone concrete visibility into the actual progress of a given project.

You should also define variance thresholds before the project starts. If a certain calculation exceeds a threshold, then you need to take corrective actions, so the project doesn’t veer too far off its course.

This is especially important for cost and schedule. A slight delay or an activity that’s slightly over budget might be ok. But if the variance is significantly higher than expected, you can make data-driven decisions before things get out of hand.

3 Tricks For Earned Value Management

To have success with earned value management, apply these quick tricks and best practices:

Accurately Track All Data

Earned value management is quantitative. The information and metrics that come from your calculations are only as good as the data that you’re tracking. There are so many different variables involved with a project, especially at scale. That means that certain data could slip through the cracks.

For EVM to be useful, all of the data must be up to date and accurate. So make sure that your team fully understands this concept. Everyone needs to report their progress in real-time. To avoid any hassle here, make sure you’re using project management software. These tools make it easy for your team to track their time and progress without causing further delays in the project. Then you can pull data directly from your PM software to accurately calculate earned value.

Avoid EVM For Agile Project Management

If you’re using an agile project management framework, EVM probably isn’t the best option for you and your team. That’s because EVM requires a complete work breakdown structure and accurate baseline budget. Without these elements, the reports won’t be very useful.

EVM works much better in predictive project management environments. Suppose things are changing rapidly, as they do with agile and hybrid frameworks. In that case, you probably won’t have enough solid information at the beginning of your project to calculate the earned value.

Agile projects have other ways to track and measure progress. But EVM likely won’t be accurate enough to benefit you.

Consider Quality and Context

While EVM is quantitative, it does not measure quality. Stakeholders and clients will obviously want to see that the project is being completed on time and within budget, but you can’t use EVM to measure your actual deliverables. Just because you’re completing the project ahead of schedule and haven’t gone over budget, it doesn’t mean that the project is successful. You’ll still need to use other techniques to ensure that you’re delivering a quality product in the end.

It’s also worth noting that most stakeholders don’t just want to see numbers. Showing someone a report of your project status with a schedule performance index or cost performance index will be confusing without context. Use clear and concise terms in natural language when explaining your progress in these reports. Avoid technical jargon that the average person won’t understand.

Effective earned value management is useless if you can’t communicate the results with context.


from Quick Sprout https://ift.tt/3xrMp9C
via IFTTT

21 Social Media Post Ideas

Social media has changed the way we live.

As marketers, we need to recognize how our current and prospective customers are utilizing these platforms and use that knowledge to our advantage. Ultimately, you want to be able to convert your social media followers into customers.

But this is much easier said than done.

Sure, you were able to get people to follow your profiles initially. That’s a great first step.

However, if you can’t post engaging content, your followers will get bored and won’t convert.

They may even decide to unfollow your accounts.

In fact, a study from Sprout Social suggests that 41% of people unfollow a brand on social media because they feel the information isn’t relevant to them. And 46% of users unfollow a brand because it posts too much, while 18% of people unfollow a brand because it doesn’t post enough.

You don’t want to fall into any of these categories.

Recognize how people use social media. With so much content to consume, your followers won’t engage with your posts if the content is boring.

Want More Traffic?

Get help with improving your traffic, leads, and revenue.

Get Started


If you’ve been posting the same thing over and over again on all your platforms, your content has already grown stale.

Some of you may not be posting anything at all, simply because you don’t know what to post.

No matter what your situation is, you can benefit from reading this guide. I’ll show you how to effectively market your small business on social media with the top 21 ideas for your upcoming posts.

1. Your latest blog post

Once you publish a new blog post, you should share it with your social media followers.

patel blog

There are lots of benefits to posting this type of content.

In addition to giving you something new to post, it will also drive more traffic to your website. Right now, it’s unlikely your customers are visiting your site on a daily basis.

They may not even know you published a new blog post unless you tell them.

Posting it on social media also exposes your blog to a wider audience. Now people who are friends with your followers can see this post and potentially navigate to your profile or website.

It’s a great opportunity for you to scale your lead generation through blogging.

2. Poll your followers

Create a poll.

Facebook, Twitter, and Instagram all have options for you to poll your followers.

A poll invites your followers to engage. They’ll share their opinions and spend more time on your profile.

There are lots of ways for you to leverage these polls.

You can use them to gain insightful information about your followers, get their opinions about a new idea, or just have some fun.

Check out this example from The Muse on Twitter:

poll

What will they do with the results of this poll?

Who knows? But 223 people already voted!

If you’re looking for something new to post that will drive engagement, a poll is definitely a top option for you to consider.

3. Use emojis

No matter what platform you’re posting on, you should be using emojis in your posts. That’s because emojis can help you improve your click-through rates.

In fact, 92% of people online use emojis.

A recent study from AdEspresso showed that Facebook headlines with emojis generated 241% more clicks than those without one.

Emojis will improve your engagement metrics.

4. Photos of your employees

Share photos of the people who make your business possible. Without your employees, you wouldn’t be able to operate.

Sharing this type of content helps humanize your brand.

Your followers will see the faces behind the company. They’ll see exactly who is creating the products they’re consuming and learn what goes on behind the scenes.

Sharing photos of your employees will also boost your engagement. That’s because pictures with faces get 38% more likes:

faces

Sure, you could post pictures with your face as well. But that will get stale after a while too.

Depending on the size of your business, some of you may have dozens of employees.

This gives you lots of chances to post new content with a new face every time.

5. Video promos

You need to post videos on social media.

More than half of marketers across the globe say video is the type of content that delivers the highest return on investment.

Further, 64% of consumers make a purchase after watching a branded video on social media.

Social media videos generate more than 1,200% more shares than images and text combined.

Take a look at how Thule used this strategy on one of its recent Facebook posts:

thule

Notice that the caption is related to the promotion.

“Explore the city. With your family.”

The video shows a mother and father going for a walk with their baby in one of Thule’s strollers.

Video content is a great way to mix up your posts because the options are nearly endless.

6. New products

You’re in business to make money.

Use your social media posts as a way to build hype for a new product launch.

This is a great chance for you to expose your products to your followers even before the products officially get released.

Once the product is available for purchase, you can take advantage of features such as Instagram shoppable posts to drive sales.

7. User-generated content (UGC)

When you’re running out of ideas of what to post on social media, you can always turn to UGC for ideas.

Look through your mentions, direct messages, and hashtags related to your brand.

Find posts of real people using your products, and share them with your followers.

User-generated content will ultimately build trust between you and your customers.

UGC

Posting UGC will also encourage the rest of your followers to share content related to your brand in the future. They’ll do this with the hopes you’ll use their content the next time you share a user post.

8. High quality photos

Earlier I mentioned that video content delivered higher engagement metrics than images. That said, you can’t just post videos and nothing else.

Posting nothing but videos will get stale. That’s why you need to mix in photos as well.

But you don’t want to use just any photo.

Unless you’re using UGC, the images should be original and high quality. Don’t use stock images, unless you can find expertly shot and unique stock photos.

But you’re not a photographer, so how can you find the right photos?

It’s easy to take these pictures yourself. Review my guide on how to take and edit photos without hiring a professional, and you’ll learn how to post quality images on social media.

9. Customer case studies

Show your social media followers how you helped one of your clients do something.

For example, let’s say you’re a personal trainer. You can share a post explaining how you helped one of your clients lose 10 pounds in 10 days.

Or maybe you have a platform that helps everyday people build hybrid mobile apps. You could show a case study outlining how much money they saved by using your platform instead of going through standard development.

The examples here are endless.

No matter what type of business you have, you can come up with a way to create a case study based on the experience of one of your customers.

10. Company accomplishments

Has your company recently achieved something?

Did you win an award? Were you featured in a positive news article?

Whatever the case may be, you can use these company accomplishments to increase your credibility. Share this news with your social media followers.

Here’s an example of how CoSchedule used this strategy on Twitter:

coschedule

It was featured on a list of America’s fastest growing businesses—something to be proud of.

By the looks of this, it appears the team celebrated this accomplishment.

Everyone in the office got together to create this GIF. This also relates to one of the strategies I mentioned above: sharing photos of your employees.

11. Bring life to old content

As you’ve gone through the list so far, you may have gotten ideas for new posts.

For example, maybe you weren’t previously sharing your blog posts on social media. But now you’re bummed out because you feel you missed a chance to share some of your best writing.

That’s not true.

You can still share an old blog post on social media if it’s still relevant and performed well for you in the past.

Or maybe you posted a photo on Twitter a couple of years ago that got a high number of likes and retweets. You could share that old image on Instagram today.

Do you have an old video promotion you uploaded to YouTube earlier this year?

Share it on Facebook.

As you can see, there are many ways to breathe life into your old content by repurposing it on social media.

12. Infographics

If you created infographics for your website or blog posts, you can use those on social media as well.

To show you how powerful this type of content can be, here’s an infographic about infographics:

infographics

Using an infographic as a visual aid can help you persuade your followers to take an action.

Plus, images jump off the page at people more than text. We know 90% of information transmitted to the brain is visual.

If you have infographics, use them. If not, you can find great ones online or create new ones yourself.

13. Inspirational quotes

Running out of ideas to post?

Well, there is never a shortage of inspirational quotes. Simply run a Google search for inspirational quotes and find one that’s relevant to your brand, industry, or marketing strategy.

Or use anything that will appeal to your audience.

If you’re a good writer, come up with your own inspirational quotes.

14. Insightful research

Has your company done a recent study on something interesting?

Share your findings with your social media followers.

Post statistics you found while conducting research, or talk about someone else’s findings.

Here’s one thing you should keep in mind when using this type of content: always cite your sources.

If you’re posting a statistic, give credit to whomever conducted the research. They deserve it, and it also makes your content more credible. Your audience will know you’re not pulling numbers out of thin air.

15. Upcoming event information

I’m sure your business will host or attend some type of event throughout the year.

Even if it doesn’t happen often, it’s worth talking about on social media.

Check out this example from Tim Ferriss:

tim ferris

He shared this event promotion with his audience on Facebook.

As you can see from the information he gave, this is clearly a local event. Unless people live in Texas, or more specifically the Dallas area, they probably won’t be attending.

That’s OK.

It’s still worth sharing. This gives your followers an idea of what you’re doing and maybe builds some anticipation for any events you’ll be hosting or attending in their area in the future.

16. Giveaways

Social media is the perfect platform for running a giveaway. That’s because all the content posted will be exposed to many people.

These giveaways and contests are especially effective if they encourage user-generated content, which I previously discussed.

Plus, everyone wants an opportunity to get something free.

If you start running contests and giveaways on social media, I’m sure you’ll see your engagement metrics spike for those posts.

17. Your recent podcasts

Do you have a podcast?

Make sure you give your social media followers updates about your latest episodes. Post direct links to them on your social sites.

Don’t rely on people finding your podcasts organically.

While you may get some listeners that way, it’s much better to target people familiar with your brand and already following you on social media.

18. Customer reviews

When you think of customer reviews, you may not necessarily associate them with your social media marketing strategy. But why not?

Showcasing reviews on social media will add credibility to your brand name.

Plus, 64% of consumers say they actively look for reviews before buying something. And 35% of people are less likely to make a purchase if they can’t find reviews.

Make this as easy as possible for your followers.

When they see other customers had a positive experience with your brand, they’ll be more likely to buy as well.

reviews

But I wouldn’t recommend flooding your social platforms with reviews.

Just like everything else, too much of one type of content will get stale. But it’s still a good idea to mix this into your content strategy.

19. “How to” posts

So you’re releasing a new product.

Depending on the type of product and the industry you’re in, using the product may not be straightforward.

This is a great opportunity for you to share a demonstration video.

If you’re already posting too much video content and you want to change your strategy, you could also post a “how to” list.

Explain a step-by-step process of how to use your product, and share it on social media.

20. Testimonials

Just like customer reviews, testimonials add credibility to your website.

This is especially true if those testimonials are coming from an authoritative source.

Look at how Olivers Apparel used this tactic in a recent Instagram post:

olivers

The post shows a high quality picture of one of its products. Simple, right?

But now look at the caption. It features a testimonial from Men’s Journal, showcasing the company’s product in a positive light.

If the brand itself wrote those exact same words in the caption without the testimonial, it wouldn’t be as impactful.

21. Throwback photos

If you’re running out of photos to post and don’t have time to take more yourself, you can always look through your archives.

#tbt

I know you’ve seen this hashtag used before. You may have even used it yourself.

Throwback Thursday gained popularity in February 2012, according to Google Trends.

This is a chance for you to post an old picture of your first storefront, old delivery truck, or something like that. You could even share a picture from your childhood, unrelated to your business. But for the most part, it’s better to stay on-brand at all times.

For example, I could post a throwback picture of me while I still had my hair, but it’s not related to my brand. But I’m sure some of you would get a kick out of it.

Conclusion

There is no excuse to let your social media content go stale.

If you refer to the list above, you’ll never utter the words I don’t know what to post on social media again.

With these 21 ideas, you’ll be able to post different content in a variety of ways for a long time. If you use the throwback photo idea, that’s one post per week, every week, forever.

You can generate a month’s worth of content by using less than half of the suggestions on this list.

Next time you think there’s nothing for you to post, think again. Keep this list bookmarked so you always have it as a quick reference.

To make things even easier for you, I’ve decided to create another quick cheat sheet you can use when trying to create the perfect social media post.

A lot of the information within the infographic may seem basic, but chances are you aren’t following all the rules.

From using hashtags to keeping your posts under a certain length, it’s the little things that can make a big difference.

How to Create The Perfect Social Post

Want More Traffic?

Get help with improving your traffic, leads, and revenue.

Get Started


from Quick Sprout https://ift.tt/3jYRM9x
via IFTTT

Monday, April 26, 2021

Squarespace Review

You’ve started your business, and you have things to share, sell, and promote. But you don’t have a website yet. You also don’t have the budget to pay a web designer or developer the big bucks to make you one.

Enter Squarespace, an all-in-one solution suitable for just about anyone looking to create a beautiful and professional website without the hefty price tag.

In our book, Squarespace stands up extremely well against its competitors. It offers tons of templates, a drag-and-drop website editor, and it’s very cost-effective when you consider the website you get in return.

But, that doesn’t mean that it’s the perfect solution for everyone.

So, let’s get stuck into looking at where Squarespace thrives and where it lags in comparison to its competitors to see if it’s the one for you!

Squarespace Pros and Cons

Pros

  • Drag-and-drop website builder
  • 100+ templates to choose from
  • Simple editing process
  • Provides everything you need for a website (host, domain, etc.)
  • Extensive online help guide
  • 24/7 customer support

Cons

  • Lack of customization options
  • Limited SEO capabilities
  • Slightly pricier than other top website builders
Compare The Best Website Builders
We reviewed dozens of website builders and narrowed them down to the best options.
See Top Picks

How Squarespace Compares to Top Website Builders

For anyone who doesn’t have experience with building beautiful websites or the budget to outsource the build, Squarespace is a top choice. With over 100 different templates to choose from and a drag-and-drop build process, just about anyone can DIY a stunning website.

Where Squarespace falls slightly against its competitors is the clunky, somewhat hard-to-understand interface and the lack of customization capabilities.

When it comes to easy design and usability, Wix is a clear winner. With the assistance of artificial intelligence and answering a few simple questions, Wix will create a custom website for you that’s bound to match your vision. You can link your website to any existing online presence you may have, and it will automatically use the same color palette, font, and branding.

Alternatively, if you’re looking for a website builder that allows you complete freedom and flexibility with customization, WordPress is the pick of the list. Sure, the learning curve is a bit steeper, but the reward is so worth it. And because WordPress is so widely used, there are tons of developers out there creating customizable themes and plugins for you to use, should you wish to avoid a complicated from-scratch website build.

Want to know more about the best website builders out there? Be sure to check out the post where we review the top six options to learn more.

Squarespace Ease of Use

When you are looking to DIY a website build, you want to make sure that you’re not going to get caught out with a lack of technical proficiency, right? Ideally, there should be no need for a designer or a developer and no need to pull your hair out in frustration throughout the process.

Can Squarespace offer you all of the above?

Yes, for the most part. When it comes to building a beautiful website, Squarespace wins hands down. You can create an impressive website right out of the box and then manipulate it to your liking in the drag-and-drop editing interface.

However, my issue with Squarespace lies in the lack of intuition said interface provides. It can be glitchy at times and hard to get some website elements to sit exactly where you want them.

And although the user interface is quite minimalistic and seemingly easy to use, if you have a website with lots of different elements, it can be hard to figure out where you are or where you need to be to make the applicable edits (for example, in the live or demo version).

With all this in mind, would I recommend Squarespace for beginner website builders?

If they want a simple website that will look beautiful and require little customization, definitely. But, if users want endless customization capabilities and are willing to fight a steeper learning curve for the first little while, then I’d have to steer them in the direction of WordPress.

Squarespace Quality of Final Product

Have you ever discovered a new business or product, loved what they’re about, and then been completely turned off by their clunky and out-of-date website? Yeah, me too.

We’re living in a world where professionalism in the online space has never been more important. So, having a professional, well-designed website that accurately reflects your business is essential.

Well, when it comes to the quality of the final product, Squarespace takes the cake. With over 100 templates to choose from, you’re bound to find one that fits your style.

These templates are designed to automatically adapt to tablets and mobile devices, so you won’t need to worry about things looking askew on different devices. In my opinion, this is a huge advantage of Squarespace as too many other website builders do not automatically do this, and a beginner web developer is not going to have the know-how to fix it.

The only thing to be mindful of here is that the photos included in each Squarespace template are specifically designed to be a certain size and style. So, when you’re updating the template with your photos, you’ll need to be careful that you don’t disrupt the entire website’s look and feel.

Squarespace Customer Support

When it comes to technology, having a knowledgeable and friendly customer support team at your fingertips is vital to maintaining your sanity. No matter how great you are with computers, there are just some things that only an expert can work out.

Squarespace extends customer support via live chat and email only. Emails are answered 24/7, while the live chat team is available from Monday to Friday during extended business hours only.

In my research, I found that although the customer support team was very friendly and reply quickly, they tend only to be effective when dealing with pretty simple issues.  When you want to start changing the website’s design or functionality with code and run into issues, you’re unlikely to get the resolution from a Squarespace customer support team.

However, there is an extensive knowledge base and online community that may help solve your issue when the support team cannot.

If you’re looking for the best provider of hands-on customer support, it has to be Wix. Their callback service is available in English 24/7 and eight other languages during business hours. But, if you prefer to resolve the issue on your own, they have an insane online knowledge base covering just about any topic you could possibly think of. You really can’t argue with that!

Squarespace Pricing

When it comes to pricing, most of our top contenders, such as Wix, Squarespace, and GoDaddy, all sit around the same price point and offer similar inclusions at each of their price points.

squarespace price

However, the important thing to note here is that all pricing listed on each provider’s website is applicable when the user pays annually. Wix and GoDaddy don’t make it easy for you to determine the price of their plans when you pay month to month.

Why does this matter?

Well, when you consider Squarespace’s monthly price, billed annually, it’s competitive with other top contenders. But, when you pay monthly, billed monthly, it skyrockets the monthly price by 30%, which is huge!

I’m not saying that the other guys aren’t doing the same thing.

My point is that the 30% hike in price may discourage those who find it easier on their budget to pay month to month from using Squarespace at all. Especially when they’re going to be paying significantly more for their website over the course of the year.

At the end of the day, Squarespace is still an affordable option for those wanting to DIY a stunning website. Just be mindful of the significant advantage of paying annually.

Squarespace Website Builder

The bread and butter of Squarespace’s product offerings is, hands down, their all-in-one website builder. You can create any website, such as a portfolio, a blog, an online store, a personal or creative CV, promote creative services, or simply advertise your small business.

The opportunities are almost endless, with tons of award-winning web designs at your fingertips. The aesthetically pleasing templates are perfect for visual-based businesses such as artists, photographers, videographers, and designers.

Once you master the drag-and-drop editor, you’ve essentially worked out how the entire website works.

Some of the things your Squarespace website builder offers are:

  • Built-in SEO tools
  • Provide in-depth analytic tracking
  • Integrate with popular apps such as OpenTable, Dropbox, Xero, and Unsplash
  • Manage your website via mobile app (including editing)

As I’ve mentioned earlier, the interface can be somewhat confusing and sometimes glitchy. But what technological product isn’t?

In my opinion, for the price point and the standard of the finished product, using Squarespace to build your website is never a bad choice for a beginner wanting a polished, stress-free website.

Squarespace Ecommerce

If you’re looking to combine premium website design with a well-managed online store, Squarespace is the one for you. Sure, many other website builders include ecommerce capabilities nowadays. But the ability to present your products and services in such an attractive way is not as common.

Squarespace’s ecommerce platform allows you to sell physical products and services, accept and manage your appointment schedule, and you can even sell subscriptions and digital content. In a nutshell, anything you can dream of selling, you can sell with Squarespace.

Some other features of the eCommerce platform include:

  • Use easily customized eCommerce specific templates
  • Connect your existing booking system with Squarespace for simplified reservation management
  • Sell in person while managing your inventory using Squarespace
  • Provide flexible payment options
  • Stay on top of your taxes with built-in tax tools

Like I said, just about every website builder offers ecommerce solutions these days. But in my opinion, Squarespace is one of the most aesthetically pleasing and easy to navigate from a customer perspective. These are important aspects for the buyer. If the website is hard to use and doesn’t present the products or service in an attractive and digestible way, you’re likely to lose the sale.

Squarespace Marketing Tools

One of the key aspects that makes Squarespace an all-in-one solution is the business and marketing tools included in your plan. We’re talking more than the standard analytics tools that most website builders have.

We’re talking about the ability to market your business by running email and social media campaigns from your Squarespace site.

Email campaigns will draw your existing products, blog posts, and logos to ensure your messaging is consistent and effective. This is a huge time saver for anyone creating and managing email campaigns through a third-party service such as MailChimp.

You’ll also spend less time designing and planning out social media content by creating professional-looking social content with the Unfold app, which includes tons of layouts, filters, fonts, and stickers to add to your content to match your brand.

In a time when content marketing is consistently labeled as king, these two features are clear advantages of creating your website with Squarespace, especially for the time-poor.

You’ll also be able to:

  • Measure your success with powerful analytics
  • Check analytics from anywhere with Squarespace’s dedicated analytics app
  • Add banners and promotions as pop-up’s on your homepage
  • Maximize searchability with built-in SEO tools

Squarespace Domains

Purchasing a domain through a third-party and then pointing it to your new website or host can sometimes be a complete nightmare. It’s technically not a hard thing to do, but I’ve never met a beginner DIY website builder who could successfully manage the process on their own (myself included).

With this in mind, it’s fantastic that Squarespace also offers you the opportunity to purchase and manage your domain through them. You are even eligible for a free domain for one year when you choose annual billing.

Some features you can expect from your Squarespace domain include:

  • Low initial cost (if any) and domain renewal at the same rate
  • SSL certificate included, so users know your website is secure
  • WHOIS privacy included
  • Easy DNS management
  • Spam-free holding pages for your domain while you work on your site vision

Already got a domain? You can easily transfer your existing domain to Squarespace. You’ll keep the time remaining on your current registration and be able to extend your registration by one year without additional transaction fees.

Although this product offering is not a deal-breaker when choosing your preferred website builder, it certainly adds extra value to your plan and takes the hassle out of managing different aspects of your website in different places.

Summary

Compare The Best Website Builders
We reviewed dozens of website builders and narrowed them down to the best options.
See Top Picks

So, would I recommend Squarespace as a suitable website builder for most? Definitely.

Squarespace is an excellent all-in-one website builder for those who want to DIY and want a beautiful and professional-looking website. The ideal user is not fussed about customization and doesn’t mind a little learning curve when it comes to the website build.

However, if you’re looking for a provider with more customization opportunities to build an in-depth website, WordPress is my top recommendation. Alternatively, if you like the idea of a drag-and-drop builder but prefer a little AI assistance with the design side, Wix could be the one for you.

And, if you’re still not too sure about which of the above website builders you prefer, be sure to read our in-depth post on the top six website builders out there today to help further your decision-making.


from Quick Sprout https://ift.tt/3dSK3sE
via IFTTT