After some trials and tribulations, you got your WordPress site up and running. Maybe this is a recent accomplishment, maybe your site has been up for a while.
Either way, you’ve been making do with basic analytics that let you know how many people are visiting your site, how long they’re staying, etc. While those are a great place to start, after some time you may feel like you’re not getting the full picture you need.
You need more information about your website and visitors in order to really take things to the next level. And the best way to do that is by using Google Analytics. Chances are good you have heard of Google Analytics, but you may not know the benefits of it, why you want it, and how to go about installing and using it.
That’s what we are here to help with.
According to W3Techs Web Technology Surveys, Google Analytics is used by 54.6% of all websites. This makes it popular enough that it should really pique your interest. And that interest should inspire you to install Google Analytics on your WordPress website.
Here is some of the information you’ll be able to gather with this addition to your website:
- How many active users are on your website at any time
- The age, gender, and location of website visitors
- The total number of visitors to your website
- Whether visitors come to your website via a search engine, social media, or some other way
- What pages are the most viewed
- How long visitors stay on each page
- And much more
As you can see, Google Analytics provides a lot of information that can completely transform how you use your website, and how visitors to your website use it as well.
Now that we have established that Google Analytics is a must for your website, now it’s time to learn how to get it set up.
What to Expect When Installing Google Analytics in WordPress
There are a few different ways that you can choose to install Google Analytics on your WordPress website, but the easiest way is by installing the MonsterInsights plugin.
In addition to being the easiest route to take, using this plugin allows you to gain access to unique features such as events tracking, file download tracking, custom dimensions, and more.
The installation process isn’t difficult as long as you follow each step in order. Before heading to WordPress to begin the installation, you must create a Google Analytics account. From there, you can start the process.
Here is an overview of the steps you will go through to install Google Analytics.
- Create a Google Analytics account
- Install and active the MonsterInsights plugin
- Follow the steps of the MonsterInsights setup wizard
- Choose any add-ons
- Install WPForms plugin
- Wait for Google Analytics to start collecting data
- View metrics in your dashboard
The Good
There are multiple different ways to install Google Analytics in WordPress, but using the MonsterInsights plugin is the most user-friendly way.
The steps for this process are straightforward and you don’t need to have extensive knowledge and experience in websites in order to add this tool.
By adding Google Analytics to your website, you gain lots of insight that will be valuable to your website in a number of ways. Here are some of the benefits of using it.
- Improves the user experience. The way that people interact with your website (as shown by Google Analytics) lets you know if there are any problem areas on the site or issues with navigation.
- Improves content marketing strategy. With the ability to see what posts and pages get the most views, you can see the type of content that best resonates with your audience and work to create more of that.
- Improves inbound marketing strategy. Since you will be able to see where the visitors to your website came from (search engine, social media, etc.), you can see where to put your marketing dollars, and where the money you’re spending on marketing is a waste.
- Improves your knowledge of your websites. The insight provided by MonsterInsights/Google Analytics allows you to better understand your website generally-speaking and helps you to trial-and-error different strategies.
The Bad
The main part of installing Google Analytics in WordPress that people struggle with is choosing the best method for them. Some people opt for the more lengthy and difficult forms of installation simply because they don’t love plugins. However, we at Quick Sprout find that plugins are a huge benefit to your website if used correctly (and depending on the plugin, of course). MonsterInsights is a trusted plugin that has been around for years and is used by millions of websites.
Because using this plugin to install Google Analytics is the easiest method, we are very much in favor of this way of doing it.
The other piece of Google Analytics in WordPress that people struggle with is analyzing the data once it is all set up to view.
A good way to solve this problem is by using the goal feature. Google Analytics allows you to set up goals in order to measure how things are going on your website. You can set goals for the duration of peoples’ visits to your site, how many different pages are visited, how many people visit those pages, and more.
Keep in mind that Google Analytics isn’t something that you need to look at every day. Take advantage of the alert feature that will let you know when something seems unusual. You can set it to let you know when site visits dip below a specific number, or when they spike way above your usual count.
Step 1 – Set up a Google Analytics account
One of the great things about Google is that it is free. Setting up a Google Analytics account will cost you nothing, and will open the door to insights that have the power to change how you use your website.
You will sign in with your Google account (this means your Gmail account if you have one). If you don’t have a Google account, you can quickly and easily create one.

Speaking of your website, if you have yet to build it, and are reading this as something to keep in mind for the future, choosing the right web hosting for your WordPress site is key to the functionality of your website, as well as getting what you want out of it.
We deemed Bluehost the best web hosting for WordPress, so take that into consideration when building your website.
Create an account name
The account name is the first thing you’ll do after you create your Google Analytics account. It is a name that will be used internally, so if your website is for your business, make the account name the name of your business. If it is a personal website, then simply make the account name your name.

Enter website information
In order to ensure that Google Analytics is pulling information from the correct website, the next step is to enter the name of your website, the URL, the industry category, and the time zone.
Accept terms of service
You must accept the Google Analytics terms of service in order to complete your account setup.
Tracking ID and tracking code
The final step of the process will take you to the screen where your Tracking ID and tracking code are. If you use a different, more complex method of installing Google Analytics in WordPress, you will need this ID and code. However, if you use the MonsterInsights method as we are doing here, you do not need this information on-hand.
Step 2 – Install and activate the MonsterInsights plugin
Now that you have your Google Analytics account set up, it is time to get MonsterInsights up on your site so that you can then connect the two.
There are two different versions of MonsterInsights — the paid premium version and the free version. If you are looking for more advanced features such as ad tracking, and more, then you want the premium version. However, the free version offers great information and is the version we chose to use for this how-to.
To install this plugin, navigate to the Plugins page of your WordPress dashboard and click “Add New.”
Activate the plugin
Once the download is complete, you will activate the plugin and move onto the setup wizard.
Step 3 – Follow the MonsterInsights setup wizard
Now that the plugin is activated, you will see on the sidebar of your dashboard a new item called “Insights.”
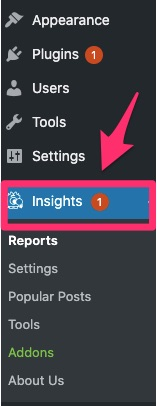
Click on this to begin the setup wizard.
Choose your website category
The setup wizard you are taken through depends on the category of website you have. You can choose from a business website, blog, or ecommerce site.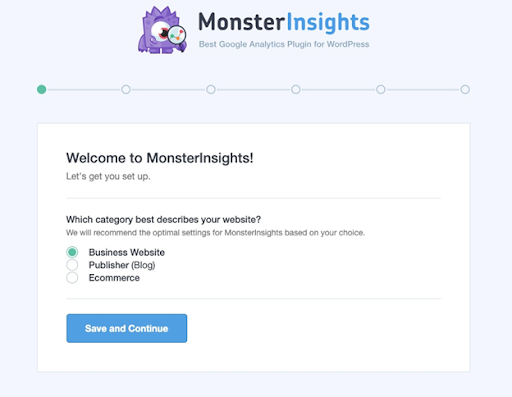
Connect MonsterInsights to Google Analytics
This is the step in which the account you created in Google Analytics becomes connected with your website.

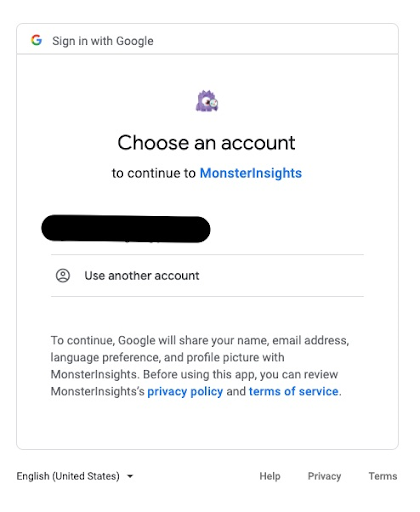
Choose an account
Pick the account that matches the Google Analytics account you created in Step 1.
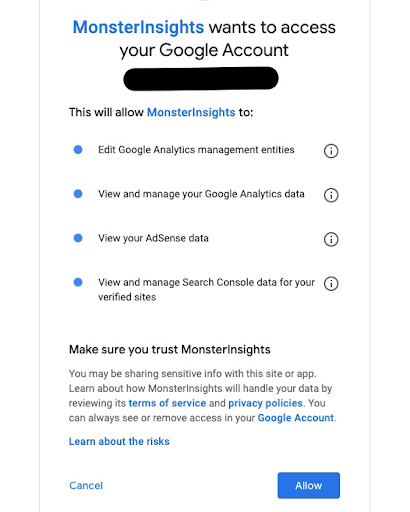
Allow MonsterInsights access
You next must give approval for Google Analytics to connect with MonsterInsights. This step cannot be skipped if you want to complete the process.
The actual connection
This final screen will complete the connection between the two.

Make sure that the profile listed is the correct website you are looking to connect to. If it does not automatically populate, click the arrow to the right to see the drop-down of other options.
Click “Complete Connection,” and congrats! You are finished with this part of the process.
Step 4 – Choose add-ons
MonsterInsights offers paid add-ons that can take the use of this plugin to new levels.
You can access them via the settings in the new MonsterInsights.

Step 5 – Set up WPForms plugin
Forms such as a contact form provide another avenue from which you can gather information to help you with your website.
WPForms is one of the best plugins for easily adding them to your WordPress site.
Regardless of what type of form you choose to install on your website, connecting it with Google Analytics and MonsterInsights will allow you to do the following:
- See what pages are best at converting
- See what forms get the most submissions
- Get insights on how to optimize your forms
- And more
Install WPForms plugin
Navigate to the “plugins” page on your WordPress dashboard, and search for the WPForms plugin.

Once you have installed the plugin, activate it.
Create your first form
Follow the step-by-step instructions to create your first form on WPForms.
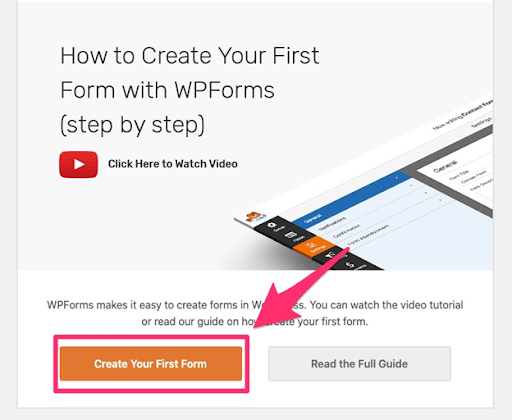
You can choose from a number of different templates available right there in WordPress, or create your own from scratch.

Step 6 – Wait for Google Analytics to start collecting data
Getting Google Analytics set up for your WordPress website is exciting. You’ve gone through all of the steps carefully and followed the above tutorial step-by-step. However, you head to your dashboard and see nothing.
Don’t immediately assume you did something wrong. Instead, wait a day. It takes Google Analytics up to 24 hours to start showing data.
Step 7 – View metrics in your dashboard
Viewing your Google Analytics metrics can be done easily from your WordPress dashboard.
All you have to do is click Insights –> Reports and from there you’ll be able to view the general report.

By scrolling down on that overview page, you can see additional information that Google Analytics has pulled including:
- Sessions: the browsing session of a single user
- Pageviews: a view on a page of your site that is being tracked
- Average session duration: average number of seconds spent on the page
- Bounce rate: percentage of single-page visits
- New vs. returning visitors: percentage of visitors that are new versus returning
- Device breakdown: percentage breakdown of devices used to view your site
- Top 10 countries: top countries that your website visitors are from
- Top 10 referrals: top websites that send traffic to your site
- Top pages/posts: the pages and posts that have the highest traffic
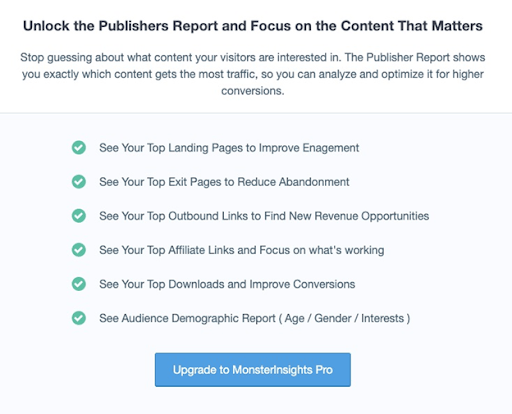
By upgrading to MonsterInsights Pro, you gain access to additional information such as the landing pages you should improve to get better traffic, what your most popular downloads are, and more.
from Quick Sprout https://ift.tt/3v3Z3ug
via IFTTT
No comments:
Post a Comment